
How to Install a uPVC Door Knob: Step-by-Step Guide
Installing a uPVC door knob may seem like a daunting task, especially if you are a first-time DIY enthusiast. However, with the right tools and a little patience, you can have your new door hardware fitted in no time. This guide will walk you through the process step by step, ensuring your door knob functions smoothly and enhances your door’s appearance.
Why Choose a uPVC Door Knob?
uPVC, or unplasticized polyvinyl chloride, is a popular material for doors and windows due to its durability, low maintenance, and resistance to weathering. Installing a uPVC door knob not only improves the functionality of your door but also adds a modern touch. Unlike traditional metal knobs, uPVC door hardware is lightweight, easy to clean, and corrosion-resistant, making it ideal for homes in humid or coastal areas.
Tools and Materials You Will Need
Before starting the installation, gather all necessary tools and materials. This will make the process smoother and reduce the risk of errors. You will need:
A new uPVC door knob set
Screwdriver (usually a Phillips or flathead, depending on your knob)
· Tape measure
· Pencil or marker
· Drill with appropriate drill bits
· Screws (often included with the knob)
· Safety gloves and goggles
Having these tools on hand ensures you won’t need to pause midway, which can affect the alignment and performance of your door knob.
Step 1: Remove the Existing Knob (If Applicable)
If you are replacing an old knob, the first step is to remove it. Open the door and locate the screws that hold the existing knob in place. Typically, these are on the interior side of the door. Use a screwdriver to carefully unscrew them, keeping the screws in a safe place in case you need them later. Once the screws are removed, gently pull the knob apart and remove any attached hardware from the door.
If your door doesn’t currently have a knob, move on to the next step.
Step 2: Mark the Position for the New Knob
Correct placement is crucial for a smooth operation. Most uPVC doors come with pre-drilled holes, but if your door doesn’t, you’ll need to measure and mark the position for the knob carefully.
Use a tape measure to determine the height at which you want the knob. The standard height is usually between 90 cm to 105 cm from the floor.
Mark the center point for the spindle (the rod connecting both sides of the knob) and the screw holes for the mounting plate.
Double-check the alignment using a level or by visual inspection.
Accurate markings ensure the door knob will sit perfectly and operate without sticking or wobbling.
Step 3: Drill the Holes (If Necessary)
If your uPVC door doesn’t have pre-drilled holes, you will need to use a drill. Start by using a small pilot bit to create the initial holes for screws, followed by a larger bit to match the spindle and mounting plate size. Always wear safety goggles to protect your eyes from plastic shavings.
Tip: Avoid using excessive force while drilling, as uPVC can crack or chip. A slow and steady drilling technique is ideal.
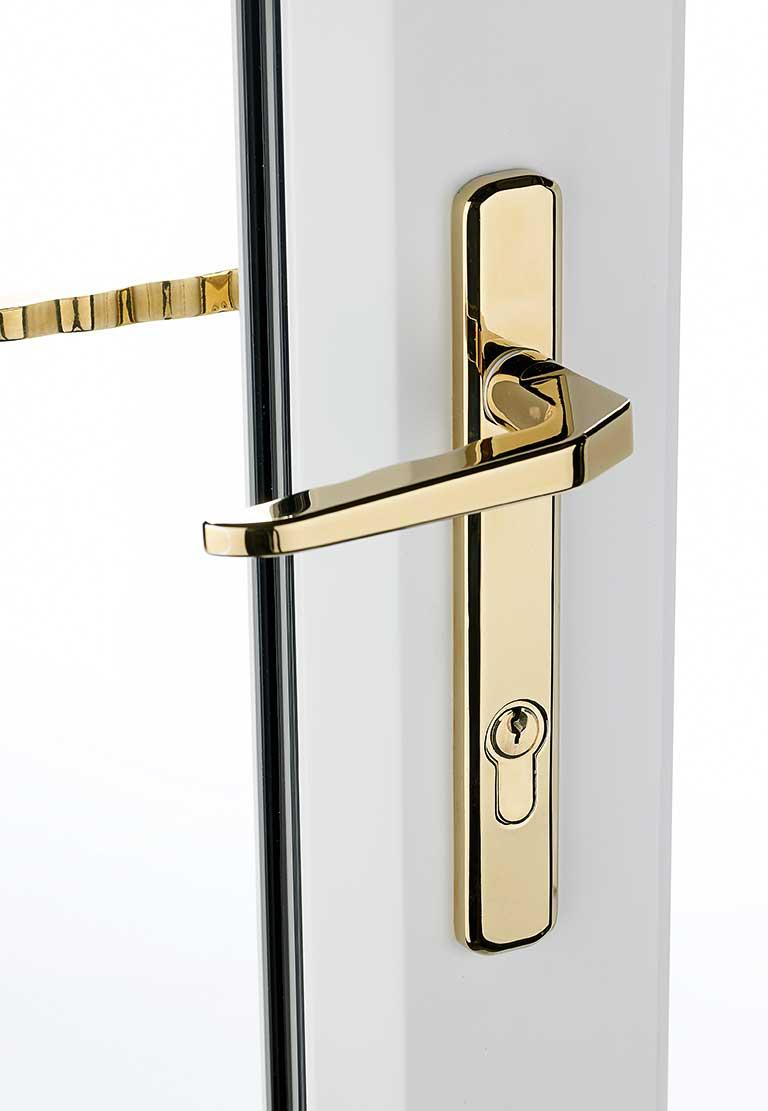
Step 4: Attach the Spindle and Mounting Plates
Most uPVC door knobs come with a spindle and two mounting plates—one for each side of the door. Insert the spindle through the hole in the door, ensuring it aligns with both sides. Then, attach the mounting plates:
Place the interior mounting plate on one side of the door.
Insert screws through the plate and into the pre-drilled holes.
Repeat the process on the exterior side, making sure the spindle moves freely and the plates are flush against the door surface.
Proper alignment at this stage is critical. If the spindle is misaligned, the knob may stick or fail to lock properly.
Step 5: Secure the Door Knob
Once the mounting plates and spindle are in place, attach the door knobs on both sides of the door. Push them onto the spindle firmly until they click or fit snugly. Then, secure them using the provided screws. Check that all screws are tight but avoid overtightening, as this can damage the uPVC material.
After securing the knobs, test the operation. Turn the knob to ensure smooth rotation and proper engagement with the latch. If the knob feels loose or stiff, adjust the screws and spindle alignment as necessary.
Step 6: Install the Locking Mechanism (If Applicable)
Many uPVC doors come with integrated locking mechanisms. If your knob set includes a lock:
Insert the lock cylinder through the door and into the designated slot on the knob.
Align it with the spindle and fix it with the screws provided.
Test the key to ensure it locks and unlocks the door without resistance.
This step is essential for both security and proper functionality. A poorly installed lock can compromise your door’s security and cause wear on the knob over time.
Step 7: Test and Adjust
After installation, thoroughly test your new uPVC door knob. Open and close the door several times to ensure smooth operation. Pay attention to any sticking, misalignment, or resistance. Minor adjustments, such as loosening and re-tightening screws or repositioning the spindle slightly, can resolve most issues.
Regular testing in the first few days after installation is also a good idea, as screws may settle and require minor tightening.
Step 8: Maintain Your uPVC Door
To keep your uPVC door in optimal condition, perform simple maintenance regularly:
Clean with a soft cloth and mild detergent. Avoid abrasive cleaners that can scratch the surface.
Lubricate the spindle and latch mechanism with a light machine oil or silicone spray once or twice a year.
Inspect screws periodically to ensure none are loose, which could affect functionality.
Proper care extends the lifespan of your doorknob and keeps it looking and functioning like new.
Common Mistakes to Avoid
While installing a uPVC door is straightforward, beginners often make mistakes such as:
Misaligning the spindle causes stiff or non-functional operation.
Overtightening screws, which can crack uPVC or distort the knob.
Ignoring pre-drilled holes and drilling in the wrong spot.
Neglecting to test the knob and lock before completing installation.
By following this guide carefully, you can avoid these common pitfalls.
Conclusion
Installing a uPVC door knob is a manageable DIY project that can enhance your door’s functionality and appearance. With careful measurements, proper tools, and attention to detail, you can achieve a professional-quality installation. Whether you are replacing an old knob or fitting one for the first time, following these steps ensures your door will operate smoothly and look great.
Investing a little time in proper installation and maintenance will keep your uPVC door secure, durable, and stylish for years to come.