
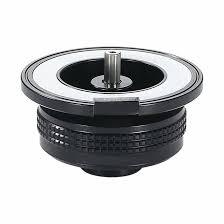
What Is The Safest Way To Perform A Leak Check After Maintenance
Nice choice — keeping valves in good shape saves fuel, prevents leaks, and keeps trips calm. When you want to extend the life of an EN417 Valve a little routine care goes a long way. These threaded safety valves are used on many disposable cartridges and combine simple parts that respond well to gentle cleaning inspection and basic replacement of wear items. A short maintenance habit prevents small faults from becoming field failures and helps you keep stoves performing predictably.
Start with a careful visual inspection. Before you connect a cartridge check the valve body for dents corrosion or foreign deposits. Look at the threads and the valve face for nicks that could prevent a tight seal. If the valve shows deep damage or a distorted thread you should not attempt to pressurise it with a stove. Observing physical condition first reduces the chance of leaks and gives you confidence the valve will seat correctly when attached.
Keep the valve exterior free of grit and grime. Use a soft dry brush or a lint free cloth to remove dust from the thread and around the outlet. If debris is stubborn a cloth slightly dampened with fresh water is fine but avoid solvents that can attack sealing materials. After cleaning allow the valve to dry completely before fitting to any appliance. Preventing contamination at the mating surfaces makes reliable connection far more likely during attachment.
Check and if needed replace small sealing parts. Many valve assemblies rely on an O ring or gasket to make the sealed interface reliable. These elastomer parts wear, especially when exposed to oils solvents or wide temperature swings. If you notice flattening cracking or stickiness replace the seal with the recommended size and material. Treat O rings as routine maintenance items rather than permanent parts so you avoid slow leaks that are hard to spot until they cause trouble.
Perform a safe leak check after any maintenance. The classic safe method is a gentle soapy water spray applied to the threaded area and valve face while the cartridge is attached and under a small pressure from the stove but not lit. Bubbles indicate escaping gas. Never use an open flame to test for leaks. If bubbles appear tighten connections or replace suspect seals and retest outdoors in a well ventilated area until no bubbles form. Proper leak checking protects people and property and is a quick verification step after any cleaning.
Operate valves gently and avoid forcing attachments. When connecting and disconnecting a stove turn off the appliance supply first let pressure release then unscrew by hand. Rough handling can damage threads and distort the valve seat so treated parts last longer and seal more reliably. If the valve feels stiff or binds when turning stop and inspect rather than applying extra torque which can create hard to repair damage. Small changes in handling preserve sealing geometry over many cycles.
Store cartridges and valves properly. Keep units upright in cool shaded ventilated locations away from direct heat and ignition sources. If a cartridge is stored fitted to a stove remove it and use the supplied cap where available. A protective cap prevents accidental actuation and keeps dust out of the valve face. Good storage preserves gasket elasticity and reduces the chance of particulate intrusion that complicates future sealing.
When deeper cleaning is required take a cautious approach. Avoid solvents or oils that can swell elastomers or leave residues that attract dust. If you need to clear stubborn deposits a cotton swab moistened with clean water and a gentle mechanical action usually suffices. Dry thoroughly with clean air or allow to air dry. Replacing worn seals after deeper cleaning is often the simplest path to restoring reliable performance rather than attempting complex repairs.
If you find a persistent leak or the valve shows mechanical wear consider replacing the whole valve assembly or the cartridge. Valves are small and inexpensive relative to the risk of a pressurised failure. A worn valve can behave unpredictably and create conditions that affect both safety and performance. Using replacement parts supplied or approved by the cartridge or valve maker preserves intended tolerances and part compatibility.
Keep a light maintenance kit on trips. A small folded cloth a soft brush spare O rings sized for your cartridges and a compact soapy water spray bottle make routine tasks simple. A basic kit prevents tiny issues from becoming trip enders and supports quick checks before lighting. Pairing a short checklist with that kit makes care habitual so valves are inspected and addressed before problems appear.
Finally, when in doubt consult product guidance. Manufacturer notes and reputable service pages describe recommended materials for seals acceptable cleaning agents and factory test practices. If you manage fleets for guiding or retail operations consider occasional supplier audits of inspection and leak testing routines so you know the level of control in production and handling. That transparency reduces surprises and helps you plan maintenance intervals sensibly.
A modest habit of inspection cleaning and timely replacement extends valve life and keeps stoves safer and more dependable. When valves behave predictably you avoid waste frustration and the need for emergency gear swaps on the trail. Careful attention now saves time and supports better experiences during every use.
To review valve families materials and handling notes offered by a parts and assembly supplier consult the product collection and technical pages at the manufacturer site: https://www.bluefirecans.com/ .